Yo. It’s finally here, people! After my garden tour video went live, this quickly became the most requested tutorial ever: the build plans for my lovely, front-yard-worthy, indestructible, and removable vegetable trellises. Today, I’m going to go through how these trellises were built, stained, laid out, and installed, as well as how I train tomatoes, cucumbers, beans, and other vegetables on them.
Layout
How Close Should Trellises Be?
Currently, my beds are 13′ long by 24″ wid,e and the walkways are 18″ wide, so the trellises are 42″ apart. That is the absolute closest I would put trellises like these. As long as the plants are properly trellised, 18″ is just wide enough for a wheelbarrow or walking with decent elbow room. I can even get my lawnmower in between, although I typically use my string trimmer to cut the grass there.
What About Shade Between Trellises?
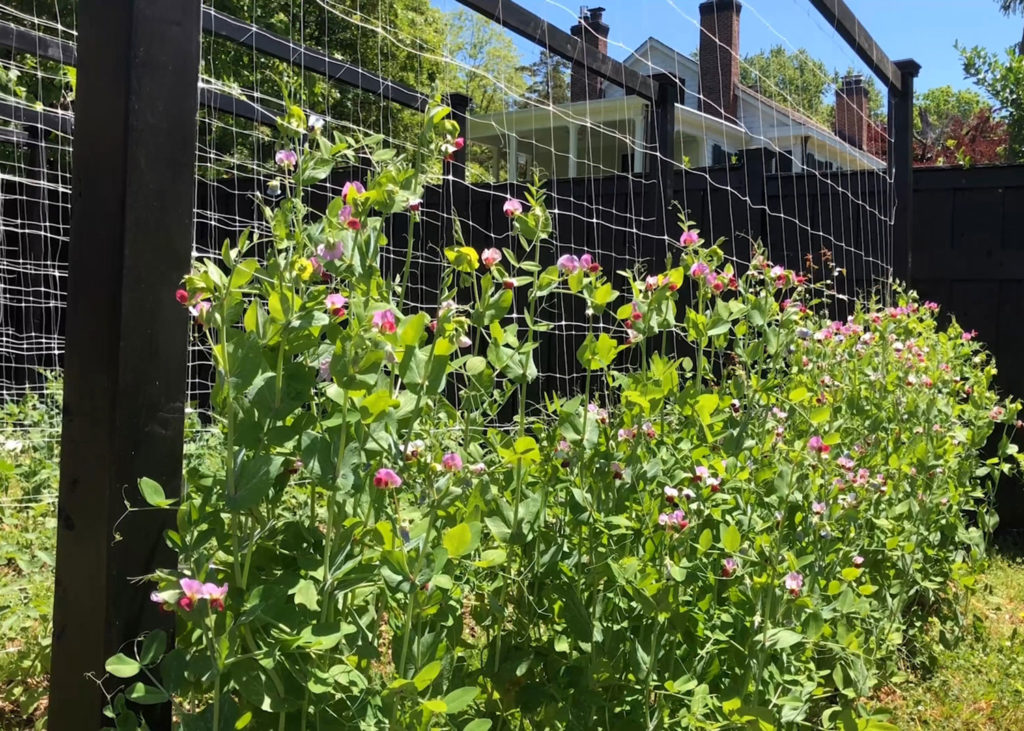
One of the questions I get asked a lot is about the shade between the trellises. I’m in the northern hemisphere, so I do get some shade on the more northern trellises in the back. Spacing them out more would help, but for now, just putting my more tolerant shade veggies like beans in the back has worked for me.
In What Direction Should Trellises Go?
Another question I get asked a lot is about the orientation of the trellises. Any structure is going to block the sun, but if you run trellises north to south, they block it less.
My property doesn’t line up exactly with the cardinal directions, though. This is south for me. So, if I didn’t want it to look misaligned with my house, I had a choice of either running them northeast to southwest, along the driveway, which was too long for my taste, or northwest to southeast, which is what I ended up doing.
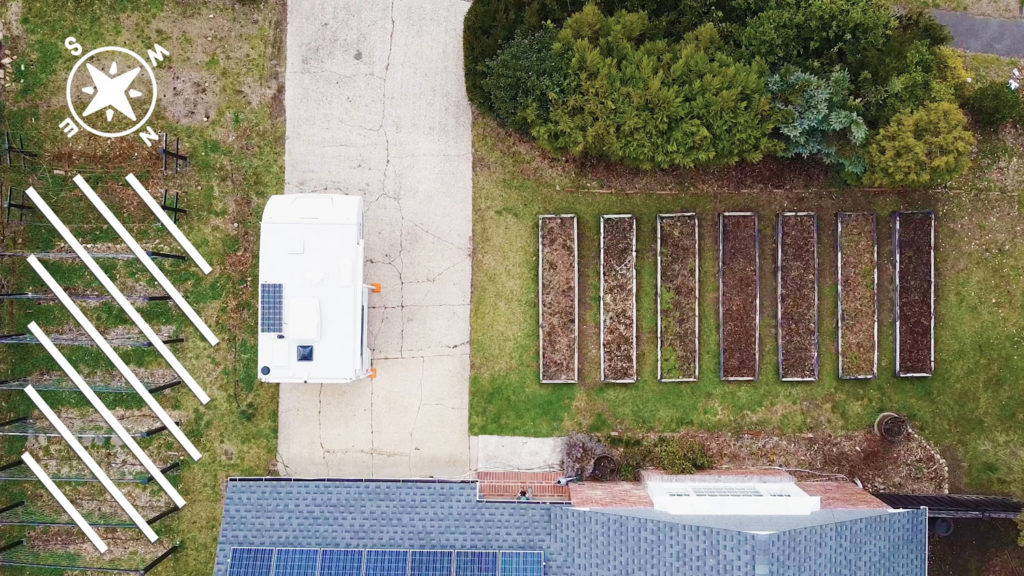
A lot of people are nervous about trellis placement, but honestly, don’t overthink it. In the grand scheme of what plants need to thrive, perfect trellis placement is not in the top five. If you can’t run them north to south, maybe just space them out more. And just be cognizant of which ones are a little shadier when you do your annual garden plan.
Cut the Posts
The first thing you’re gonna want are two 7-foot 4×4 posts. I actually started with 8-foot posts, and then two years later, ended up cutting them all down by a foot. Almost all my crops, the beans, tomatoes, and cucumbers, went 8 feet high, so that wasn’t the problem. I just had a problem reaching that high. Plus, my fence was six feet, so I thought it looked less imposing, making them a touch shorter.
Get the 4x4s someplace stable, like a workbench or set of sawhorses, where you can clamp them down. Use a scrap piece of 2×4 to mark the top notches. If you’re putting post caps on the top as I did, make sure you allow extra room for that. I forgot when I initially built one of my trellises and had to fix that later.
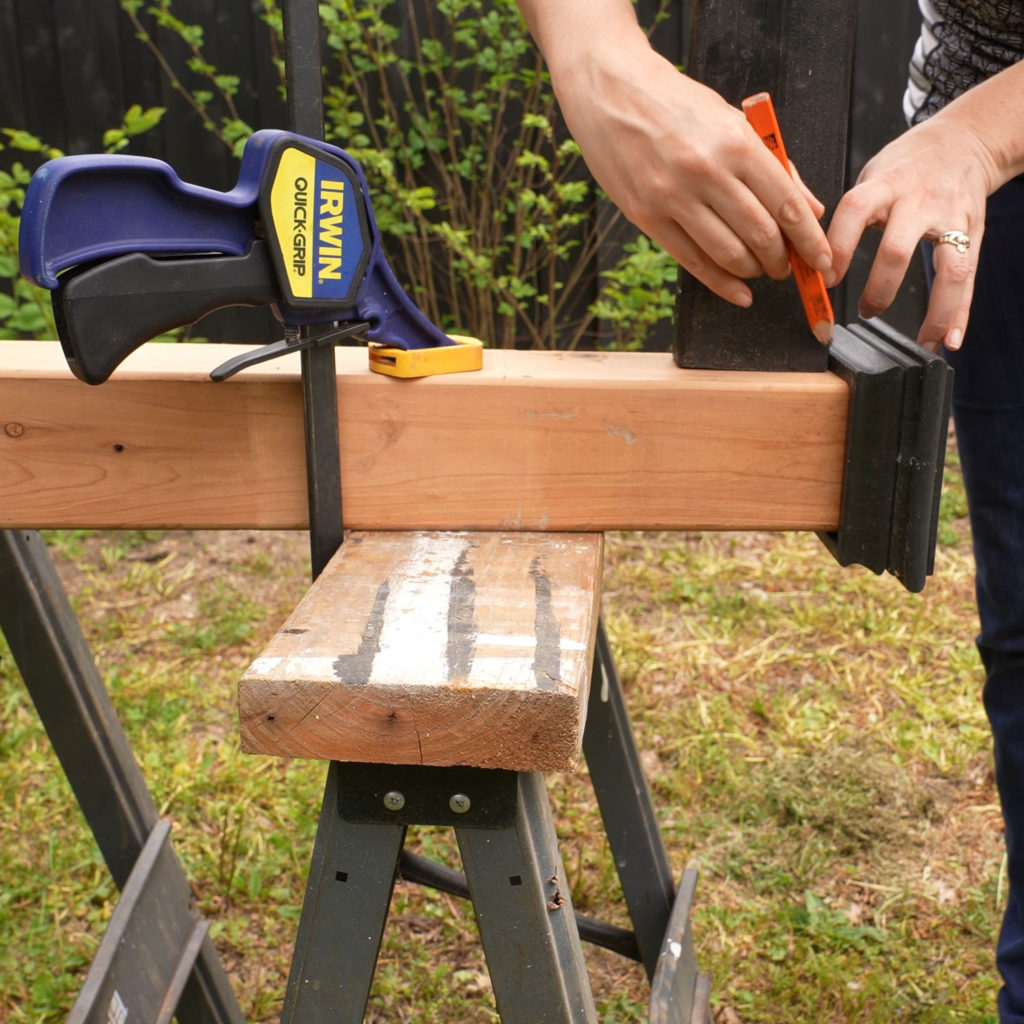
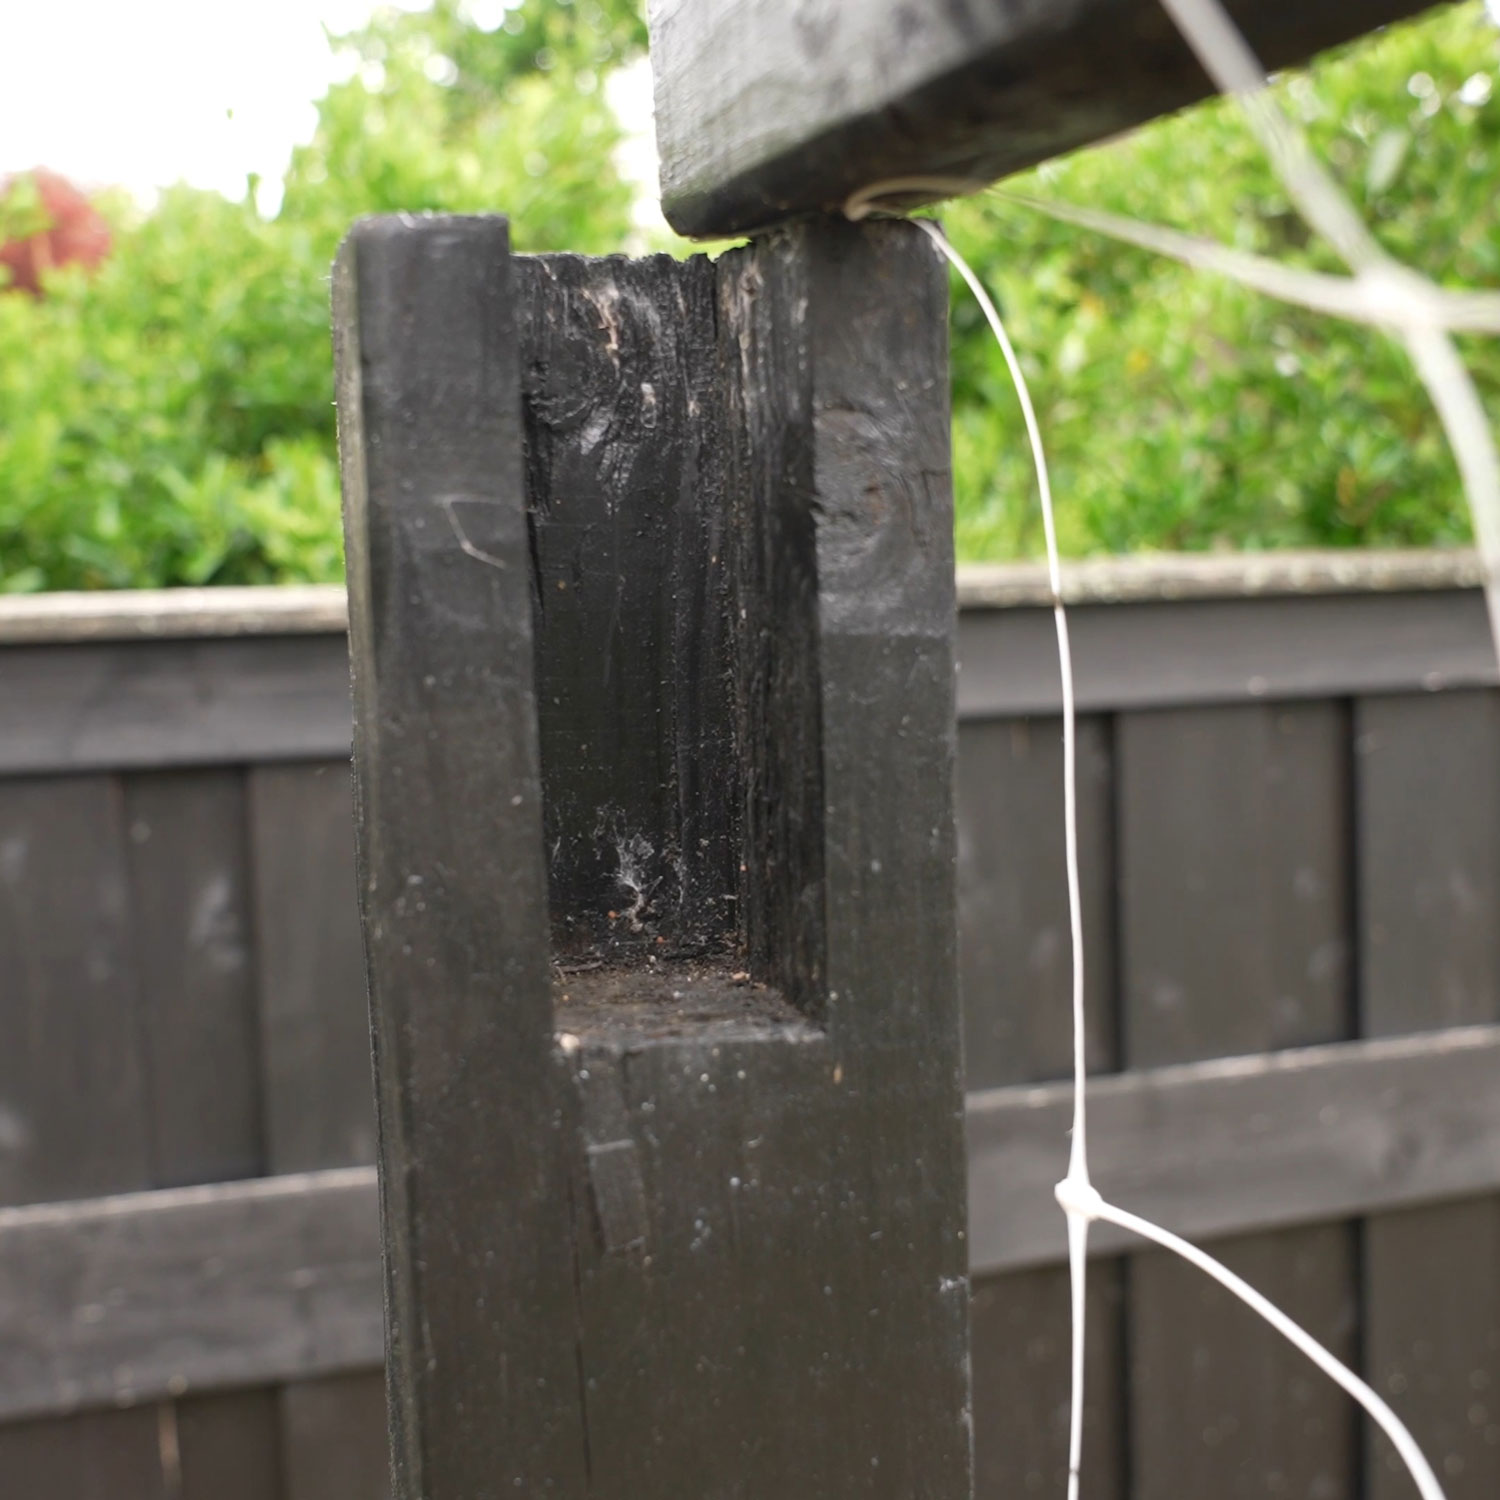
Now we just need to cut this notch out for the 2×4 cross-beam to rest in. I am no professional woodworker here, so I did this by sawing diagonally with a sharp handsaw and then chiseling out the notch area from the top and from the end using my much beloved super-sharp chisel set.
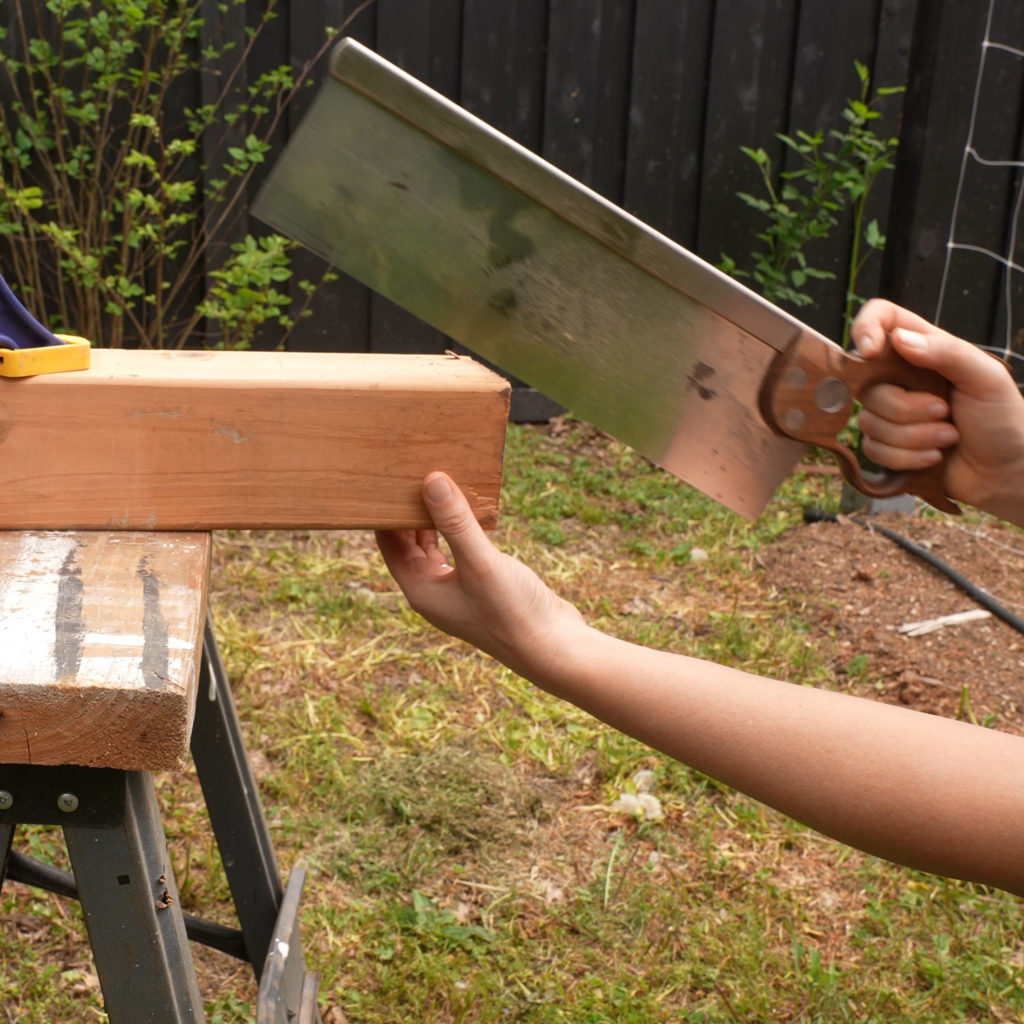
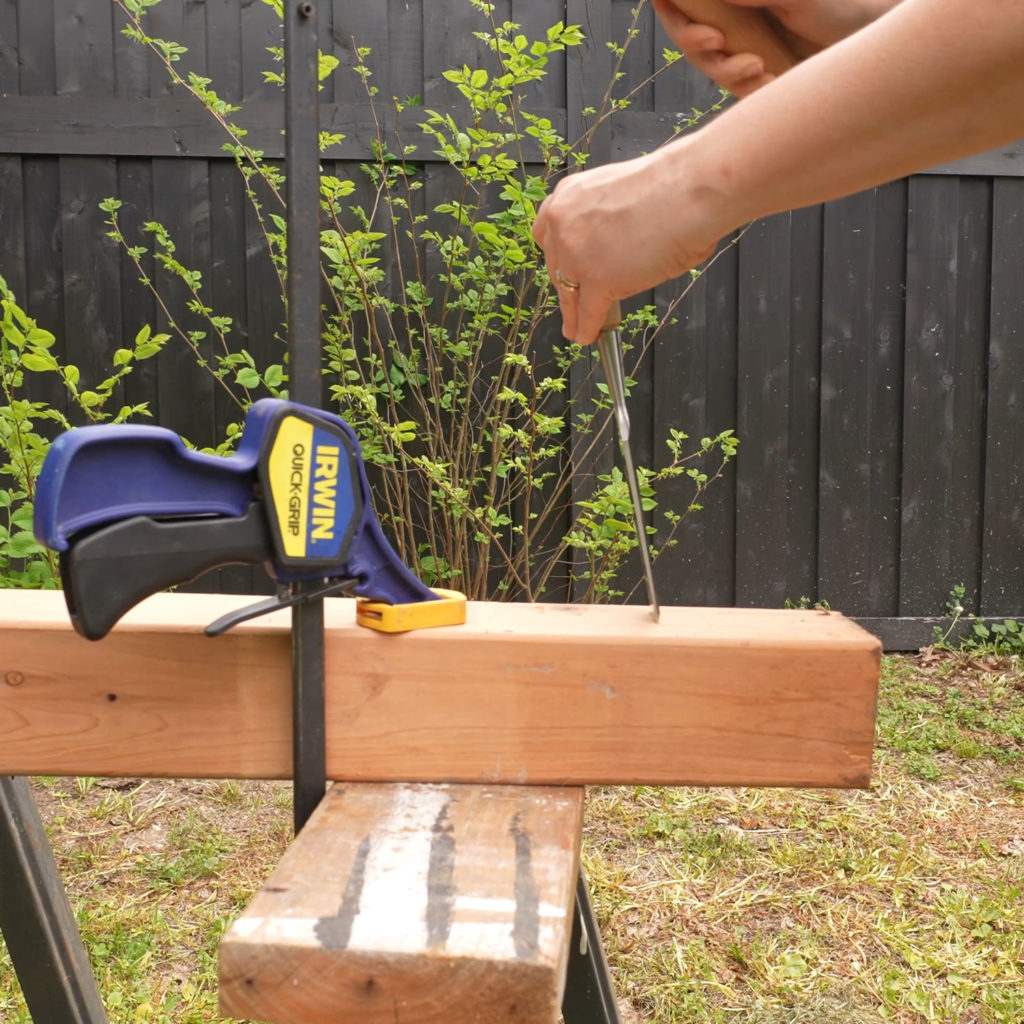
You pros out there, let us know in the comments if there’s a more efficient way to do this, or a good way with power tools.
You can also cut a large groove clear through to the other side, as my friends did in their garden. This would be super fast to do with a couple of close cuts of my circular saw, but it has a different look.
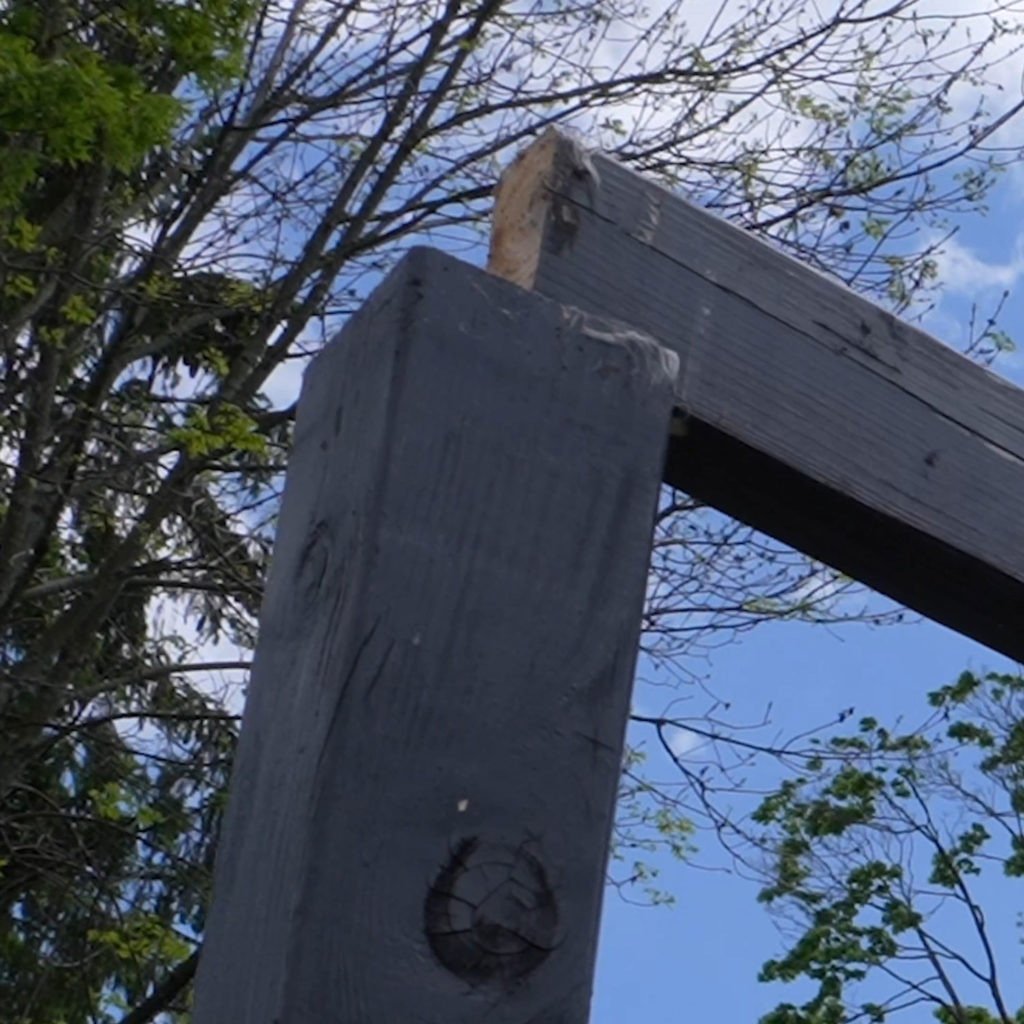
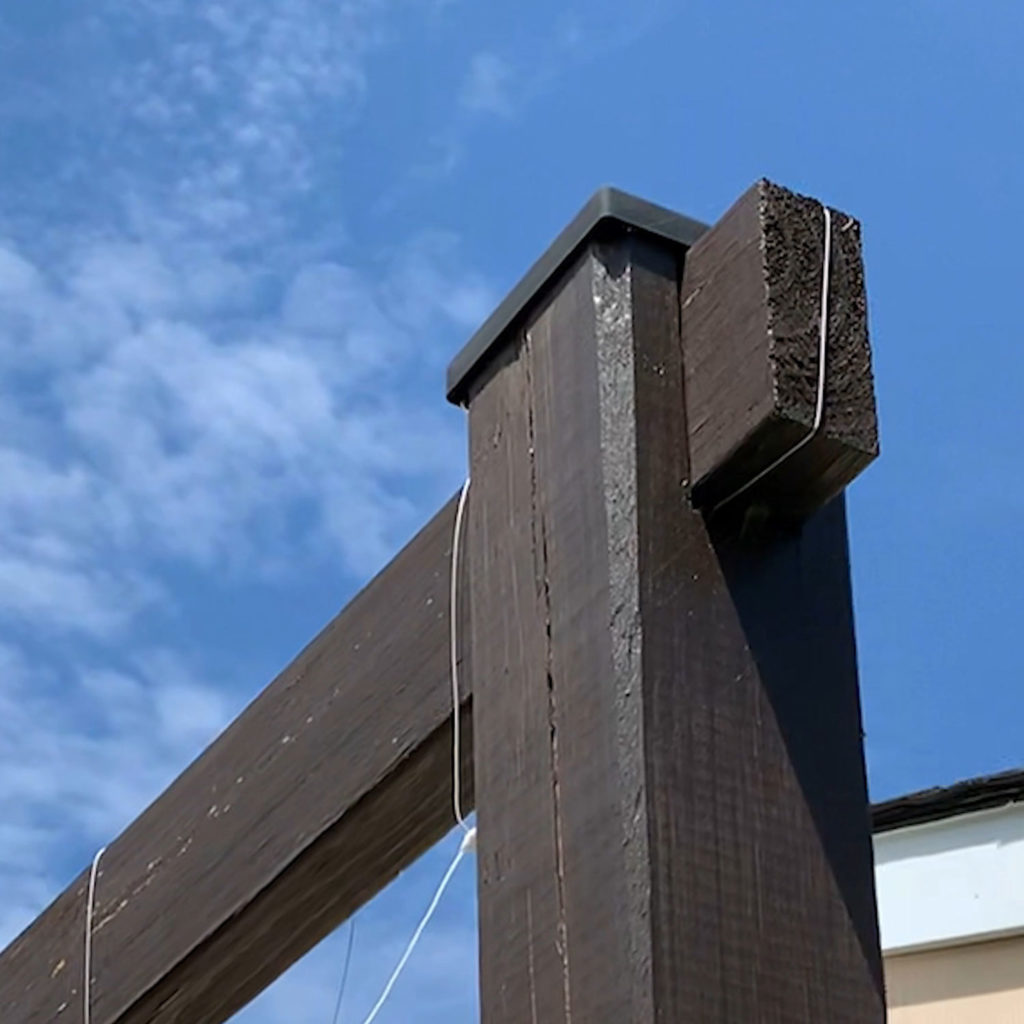
Either way, use the scrap piece of 2×4 to make sure it’s a snug fit. You don’t want the 2×4 shifting around, but you don’t want to have to beat it in either. Once you got your two posts notched out, it’s time to install them.
Install the Posts
Install the Post Spikes
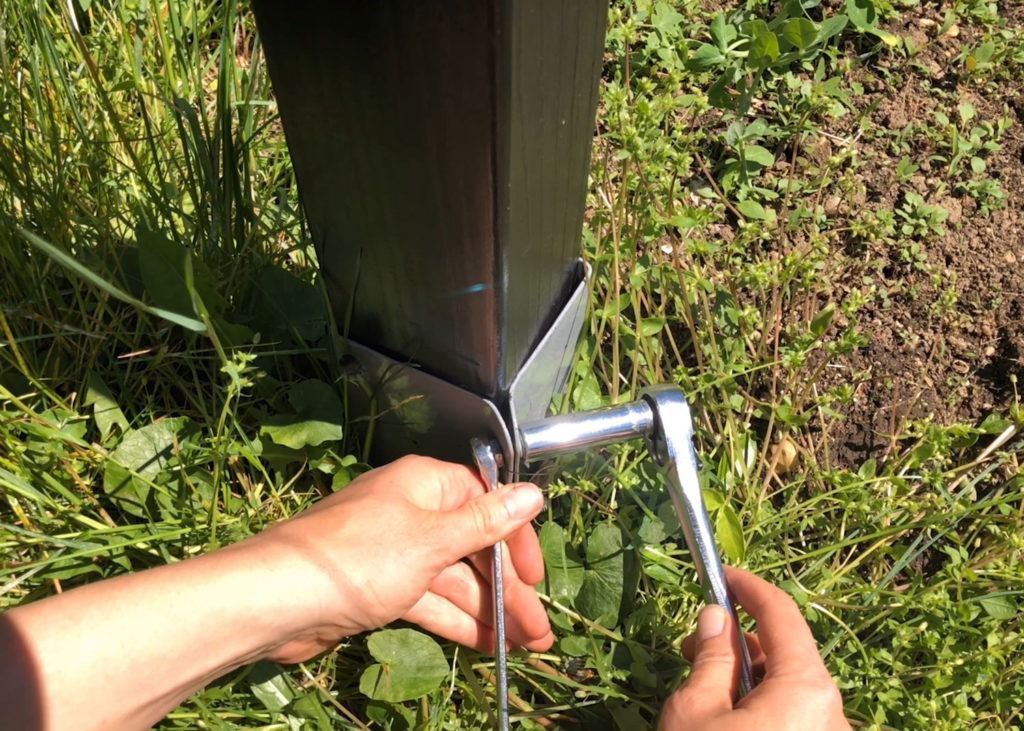
Now I’m sure you can install these posts just by digging them into the ground, or even using cement, but I used post spikes for my trellises. The post spikes cost a little more, but if you want, you can easily uninstall your trellises every year, or even move them.
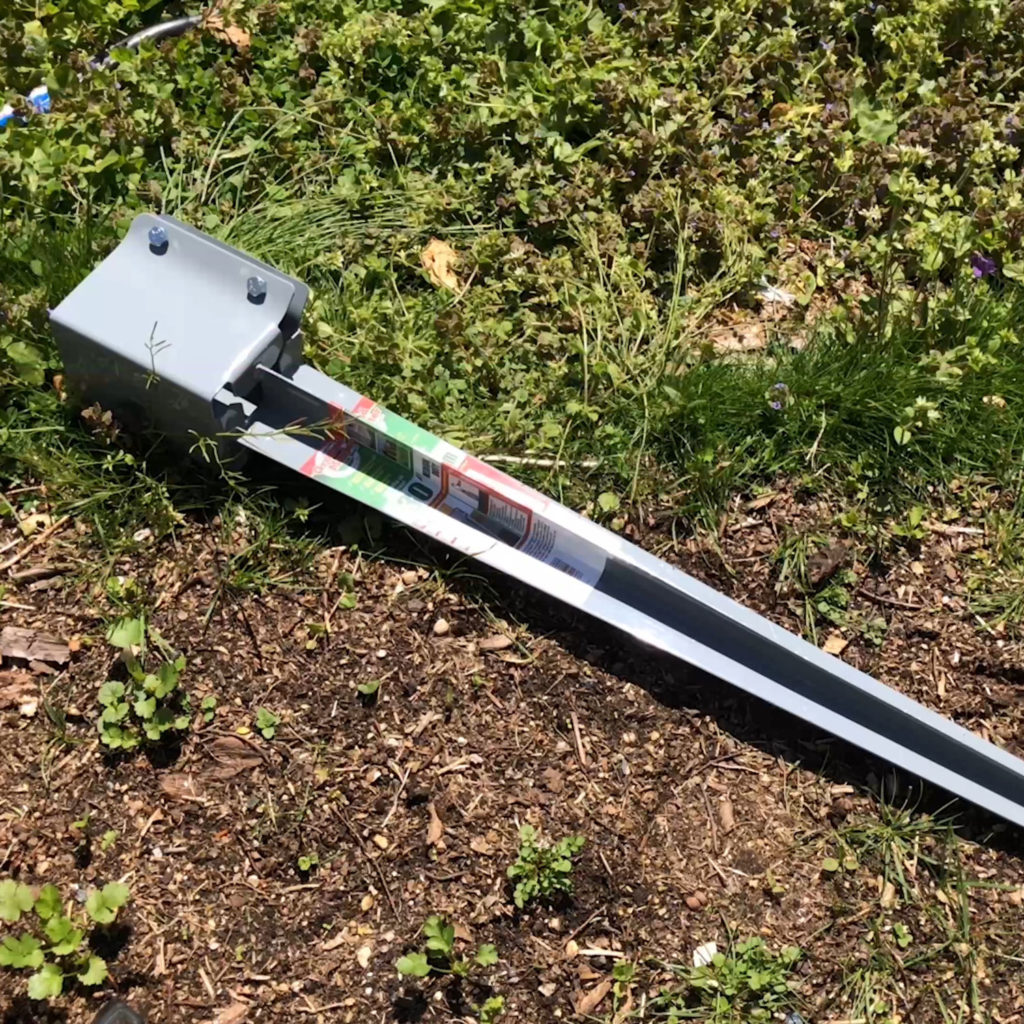
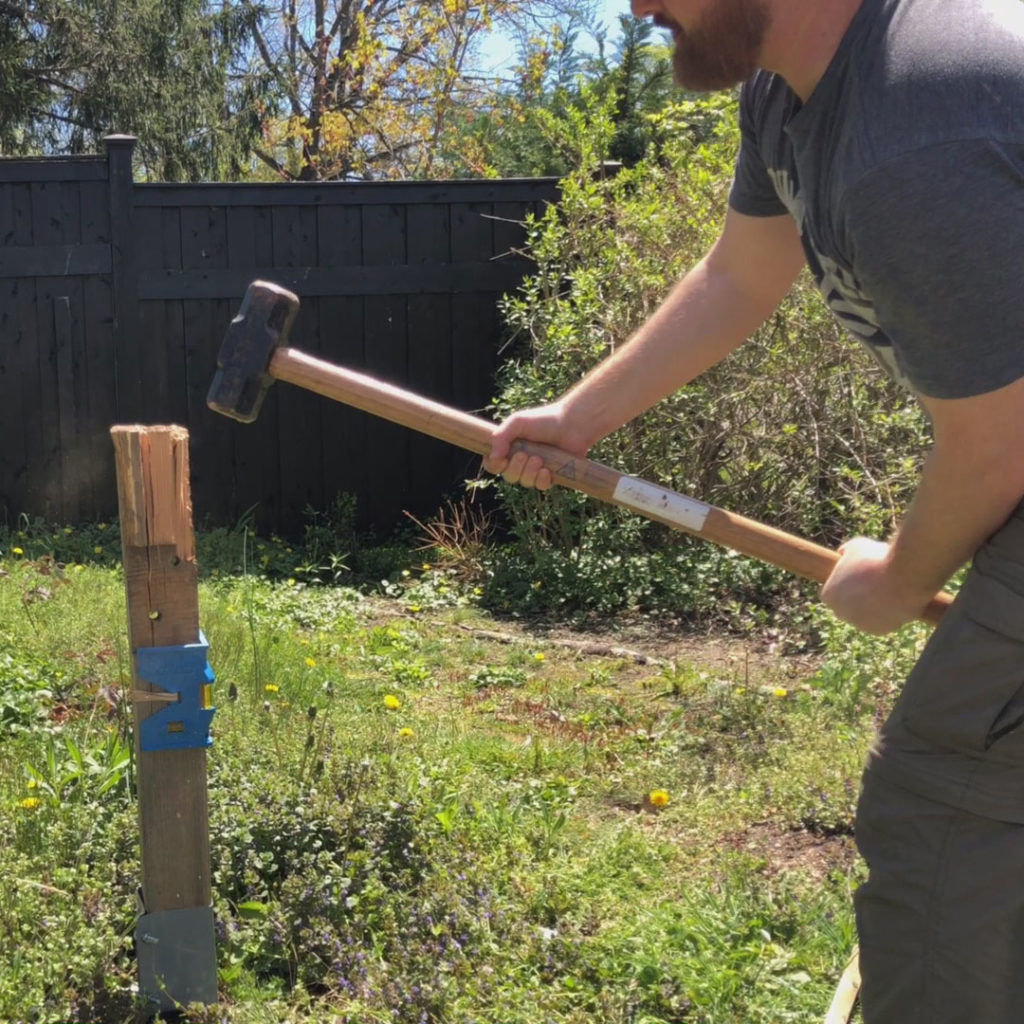
When I first installed them, I thought I was gonna take the trellises down every year. I’ve never done that (ha!), but I have moved all of them at least once, trying to better fine-tune the layout. And the post spikes made it a lot easier.
There are a couple of tricks to installing these spikes.
- Have a big sledgehammer to pound them in.
- Use a cheap post-leveler and keep re-checking and re-adjusting as you pound in the spike. The further the spike gets into the ground, the harder it will be to move from side to side, so adjust early.
- Use a sacrificial piece of 4×4, maybe 3-4′ tall, not your actual post, because it will get destroyed getting pounded in!
Cut the Posts Down to Proper Height
Once you get the spikes in, it’s time to adjust the heights of the posts so we can make sure the whole cross-beam is level. There’s probably a million ways to do this, but I ended up throwing the 2×4 on top of the two spikes and then laying a level in the middle.
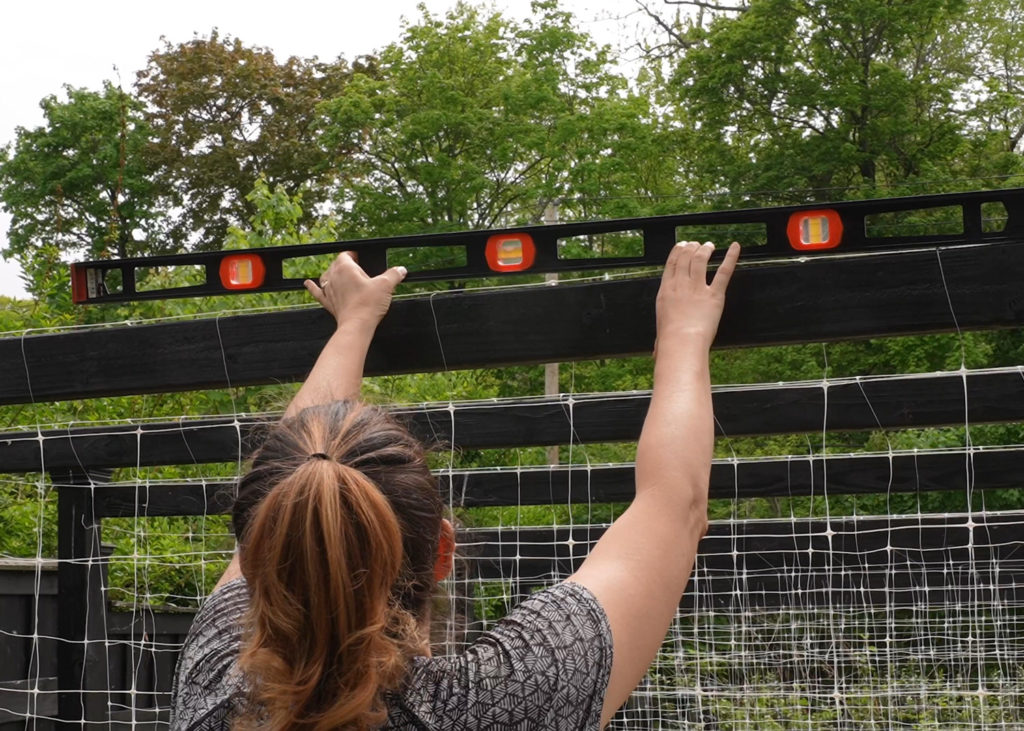
Depending on how your land slopes, you’ll probably have to shorten one of the posts so that the top is level. Obviously, cut the bottom of the posts, not the notches we just made!
You can get a good idea of how much you’ll need to shorten the post by lifting the level until the bubble goes to the center and then mentally following the angle out to where it meets the post.
Bolt in the Posts
Once you got the posts the right height, bolt those in solidly and then double-check that they’re straight and completely vertical. They’ll need to be in their final placement to size the cross-beam properly.
Install the Cross-Beam
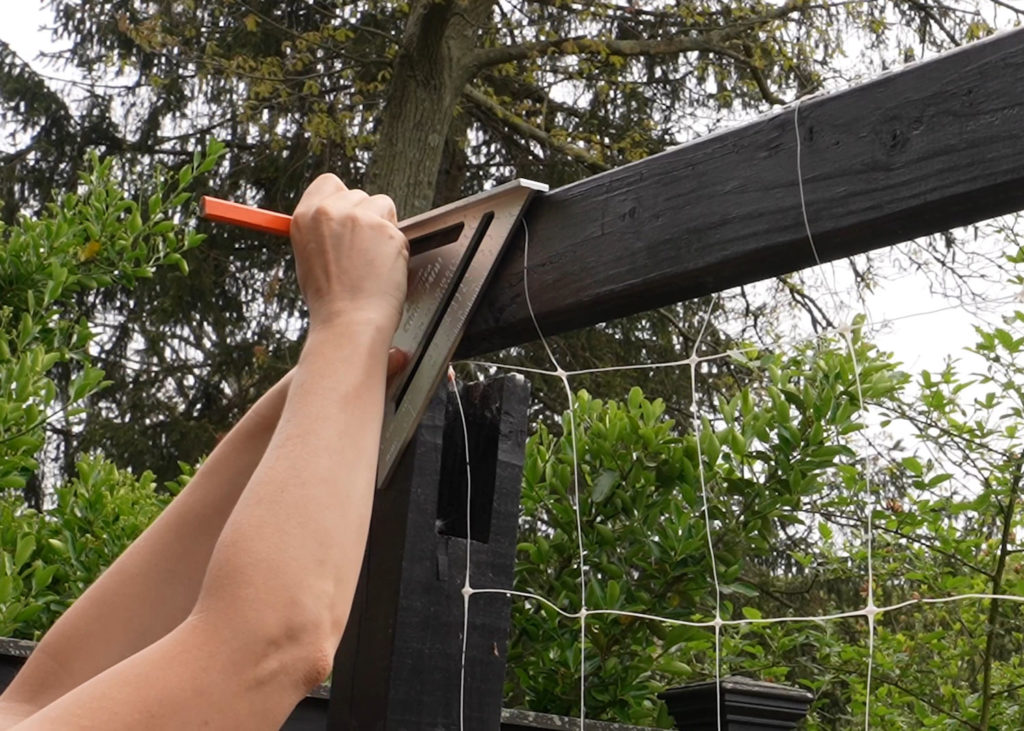
The cross-beam is a simple 2×4. You’ll need it for the length of your bed. My beds are 13 feet long, so I bought 16-foot 2x4s and then cut them down. I marked out the length by putting the board up on both posts and then marking the end with a speed square.
This is probably a good time to say that building these trellises works best before you’ve planted anything. I can’t tell you how many times, while building these, that I stepped on plants, or dropped a board, a tool, or the netting on my tomato seedlings. They were definitely not happy!
If everything’s cut right, the 2×4 just rests in the notches with no problems. Of all of my trellises, there’s only one I had to drill in a screw, and it’s because I cut it a little too short. All my trellises have weathered several hurricanes and tropical storms with no incidents. And I bet the majority of trellises cannot say that!
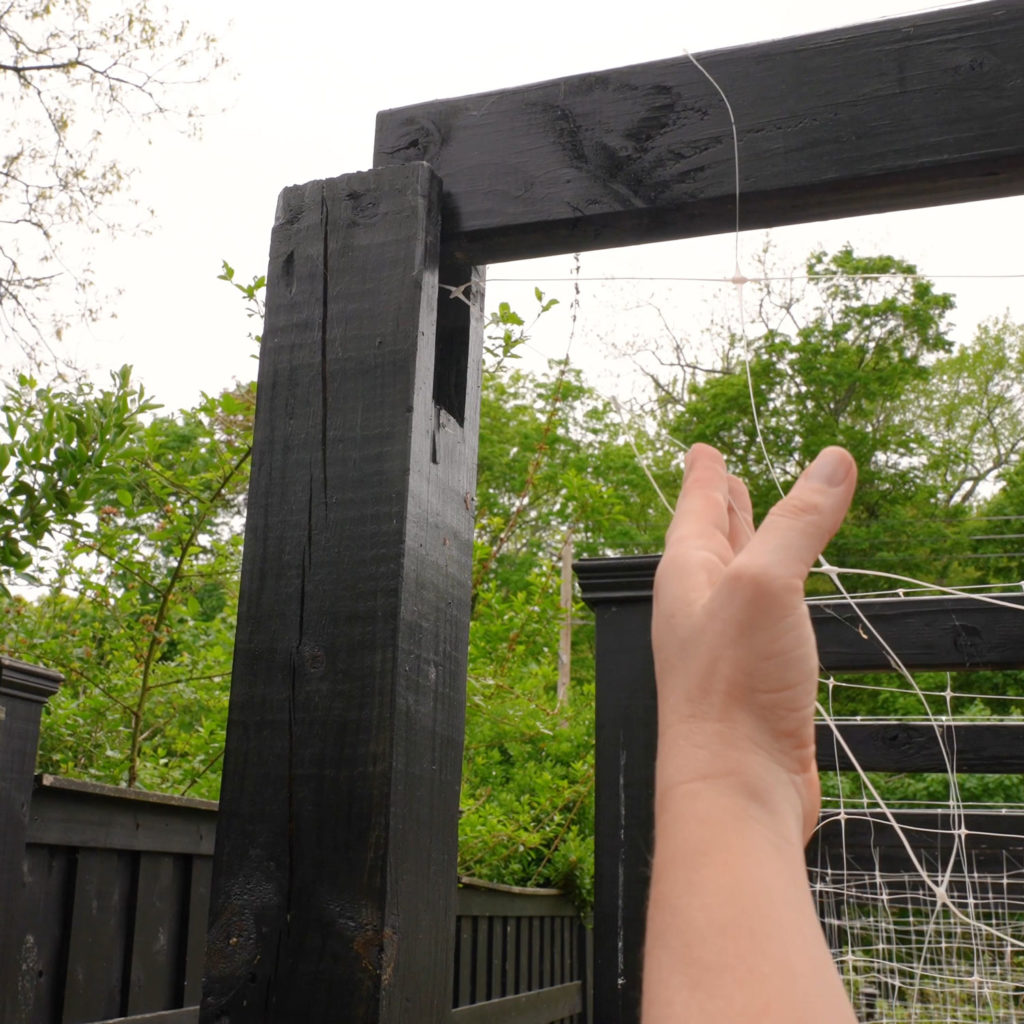
Another question I’ve gotten is whether I need support for the cross-beam. These boards are 13′ long, and they take a lot of weight. One of the primary reasons is that the board is set vertically on its edge, not lying flat. That’s where the strength comes from.
I could probably make the rows longer without changing the design. If you do need more support, though, you could either add a middle post or maybe even upgrade the cross-beam to a 2×6.
If any of you guys do this, let us all know in the comments so we can hear what works!
Stain
Now If you want a natural look, you can skip the staining step, but I could not resist. A lot of people ask me about the black, if there’s a reason. People have asked if it keeps the plants warmer. I am here to tell you there is absolutely no reason other than I think it looks cool!
And of course, I’m cool because my trellises are cool.
So yeah.
It’s not the easiest to keep clean, between bird poop and flying grass from the string trimmer, but it does protect the wood, which, besides looking cool, and matching the fence and garden beds, is probably worth the extra hassle.
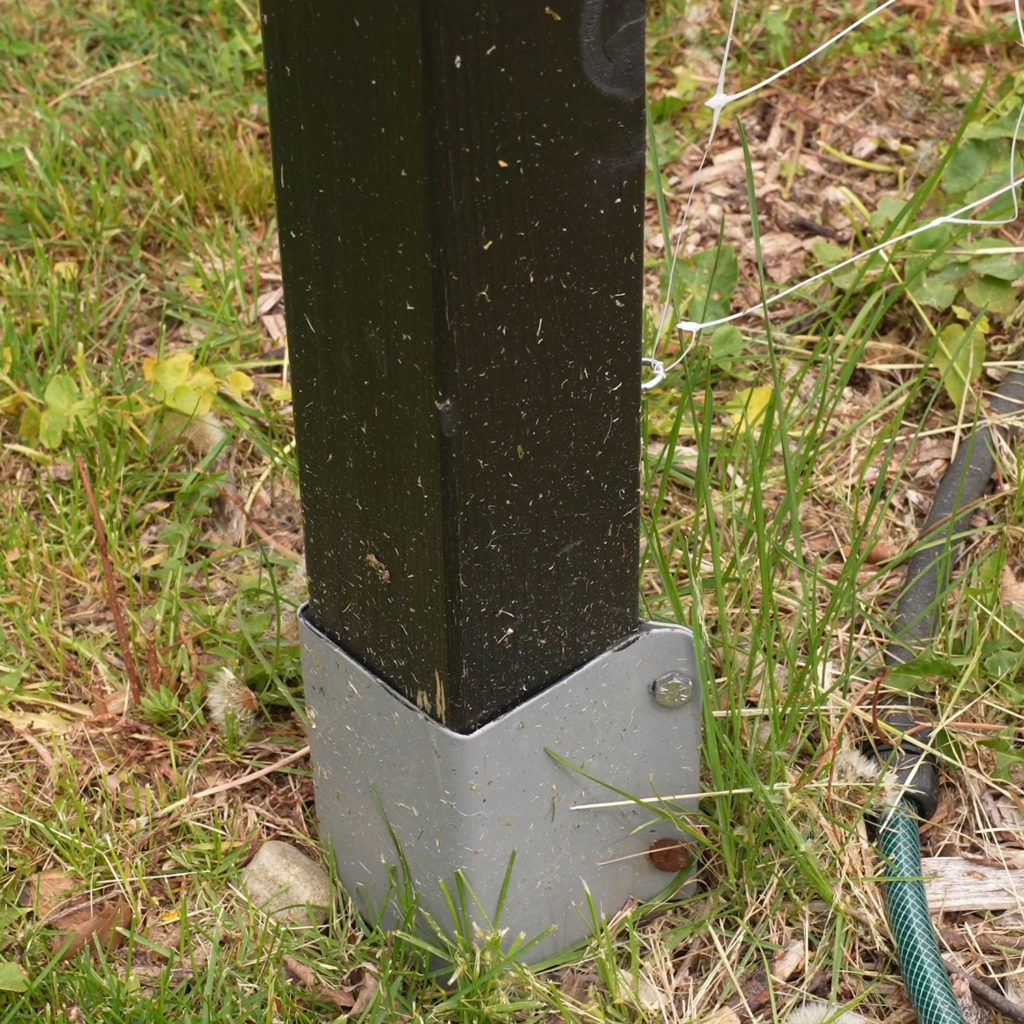
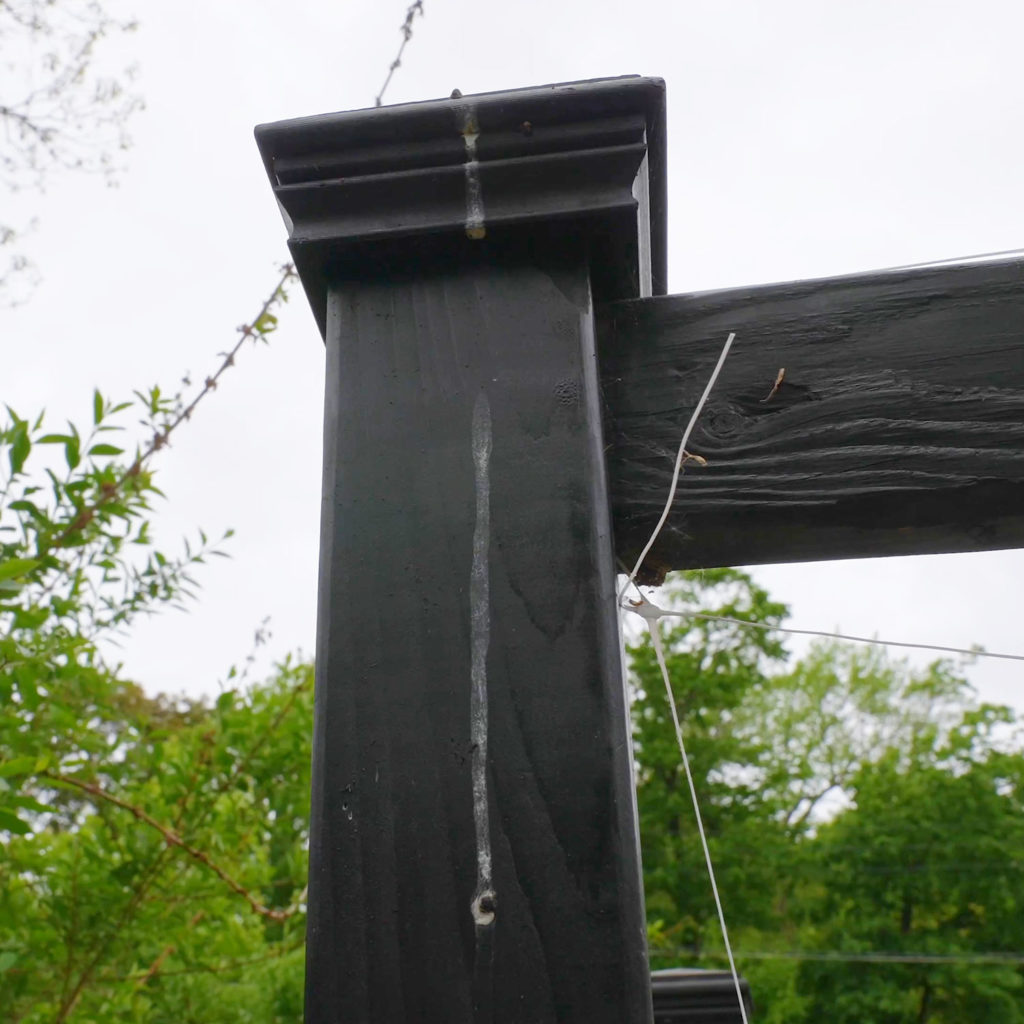
I used an eco-friendly stain from Timber Pro, their Deck & Fence formula in Ebony. This is the same stain we used on our fence, and my blackberry trellises, and I plan on using it on my new garden beds, too. It’s low VOC, nonflammable, cleans up with water, and is made of renewable plant-based oils. It’s the only stain I’d feel comfortable with around my food.
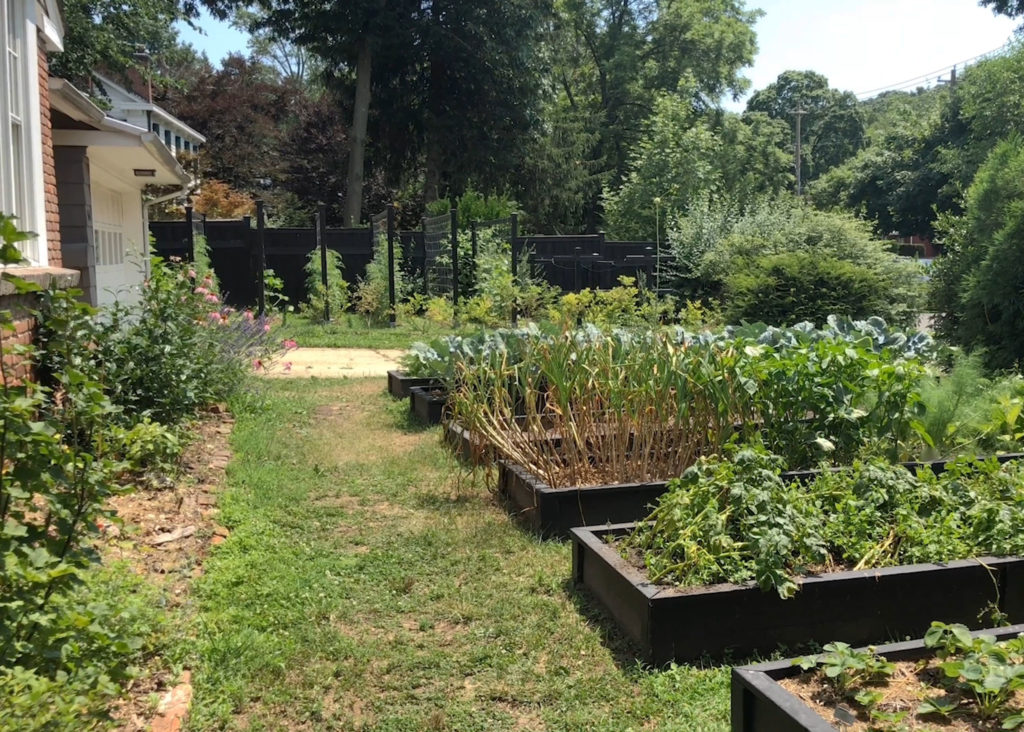
You’ll want to do 2 coats. Just follow the instructions for temperature and wait time between coats on whatever stain you use.
You can uninstall the pieces to stain if you want. Me, it seemed easier to get on the ladder with my brush and stain them, since I didn’t have to redo the install, and I’d have access to all the faces and sides of the posts and cross-beam.
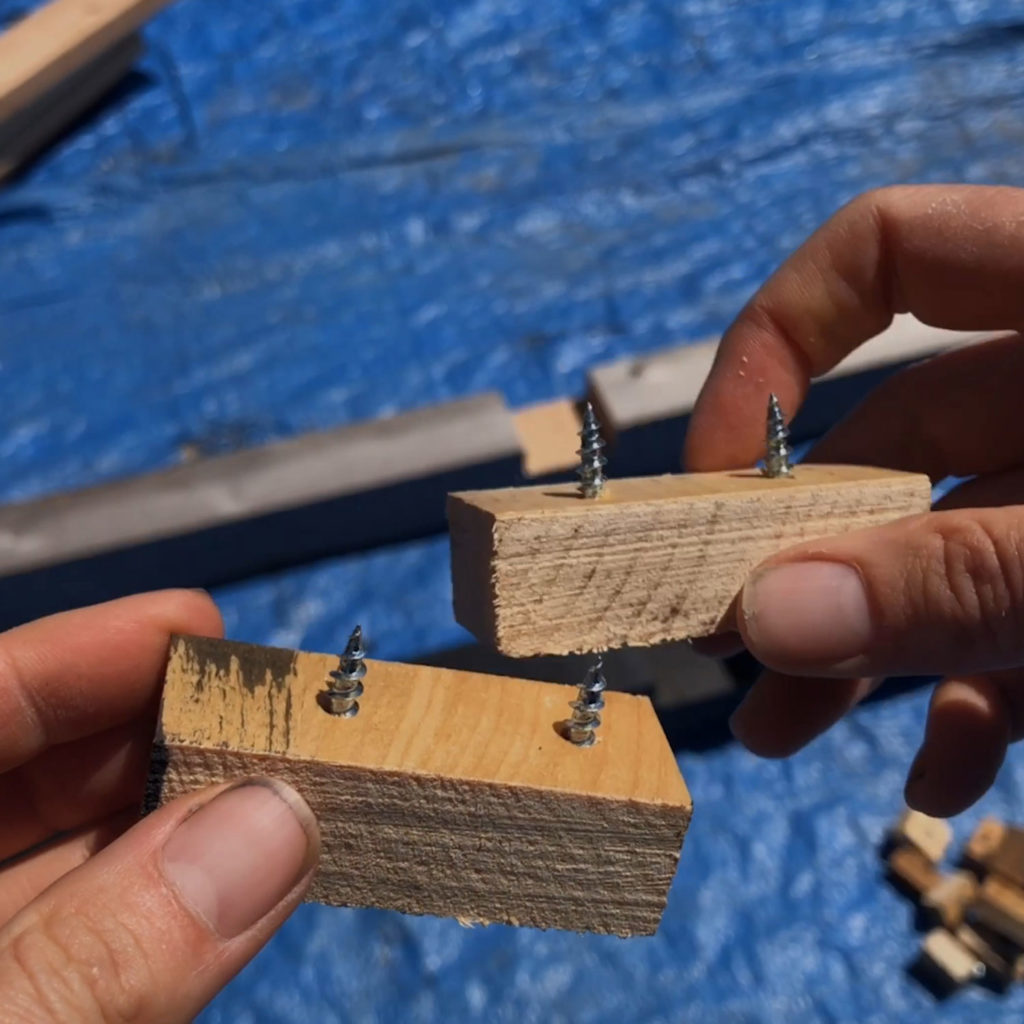
If you do uninstall to stain, you can use homemade stand-offs, made out of scrap wood and screws, to balance the still-wet sides on. That way, you can stain the other side without marring the surface.
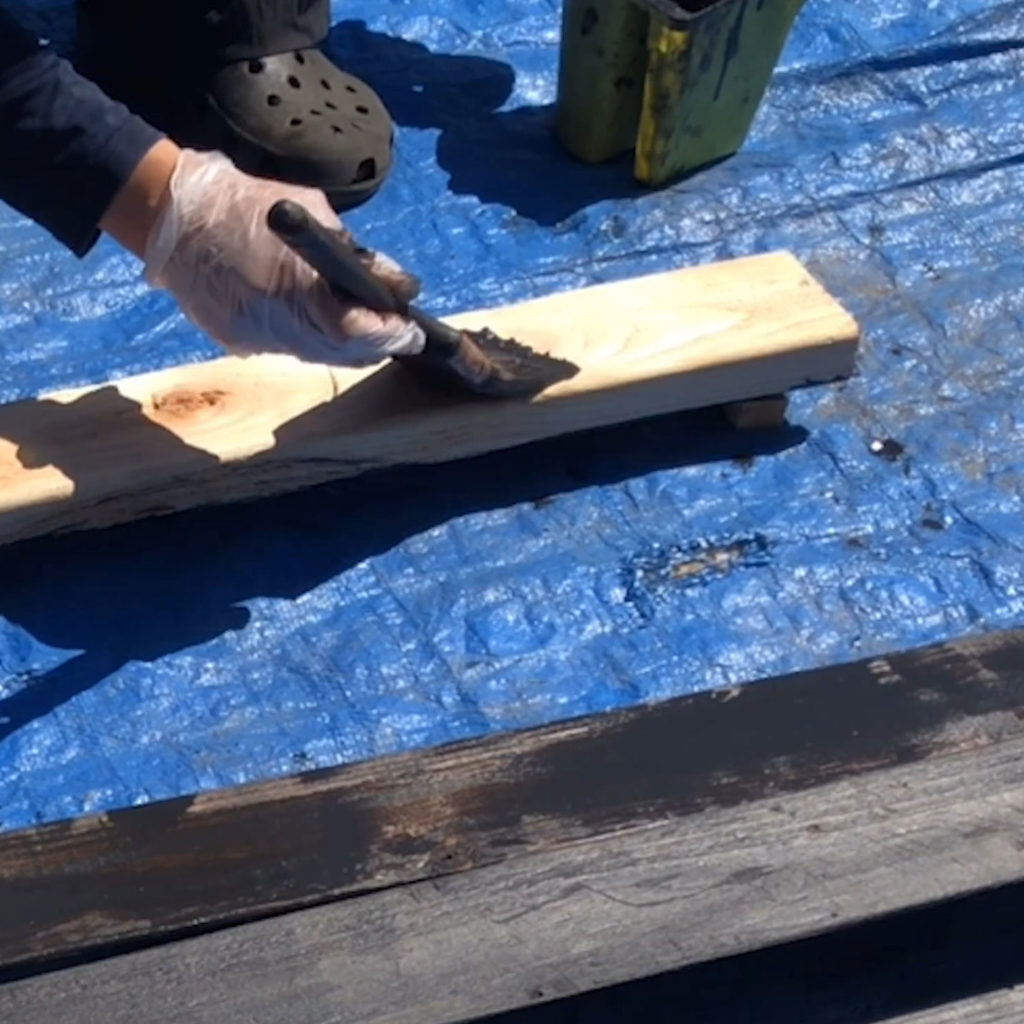
You can also stain everything before you cut it down, but if you do that, make sure you stain the cut ends and the interior of the notch afterwards.
Install the Trellis Netting
Last, but not least, is the trellis netting. I use a Hortonova trellis netting made by Tenax. It’s super affordable and made of polypropylene. It comes in different lengths and heights. For my 7-foot trellises, I got the 6.5′ height.
That’s the tallest height it comes in, so that was actually another reason I made my trellises shorter. At 8′ tall, the netting had a good 12-18″ before it reached the ground, which was kind of a pain.
As you can see, it’s not completely indestructible, but to be fair, a lot of this is me, with the string trimmer and scissors, when I cut away the old plants in the fall. I’ve had all of these up for about 4 years now. It is definitely time to replace a few of these, which is perfect timing, because it means I can show you guys.
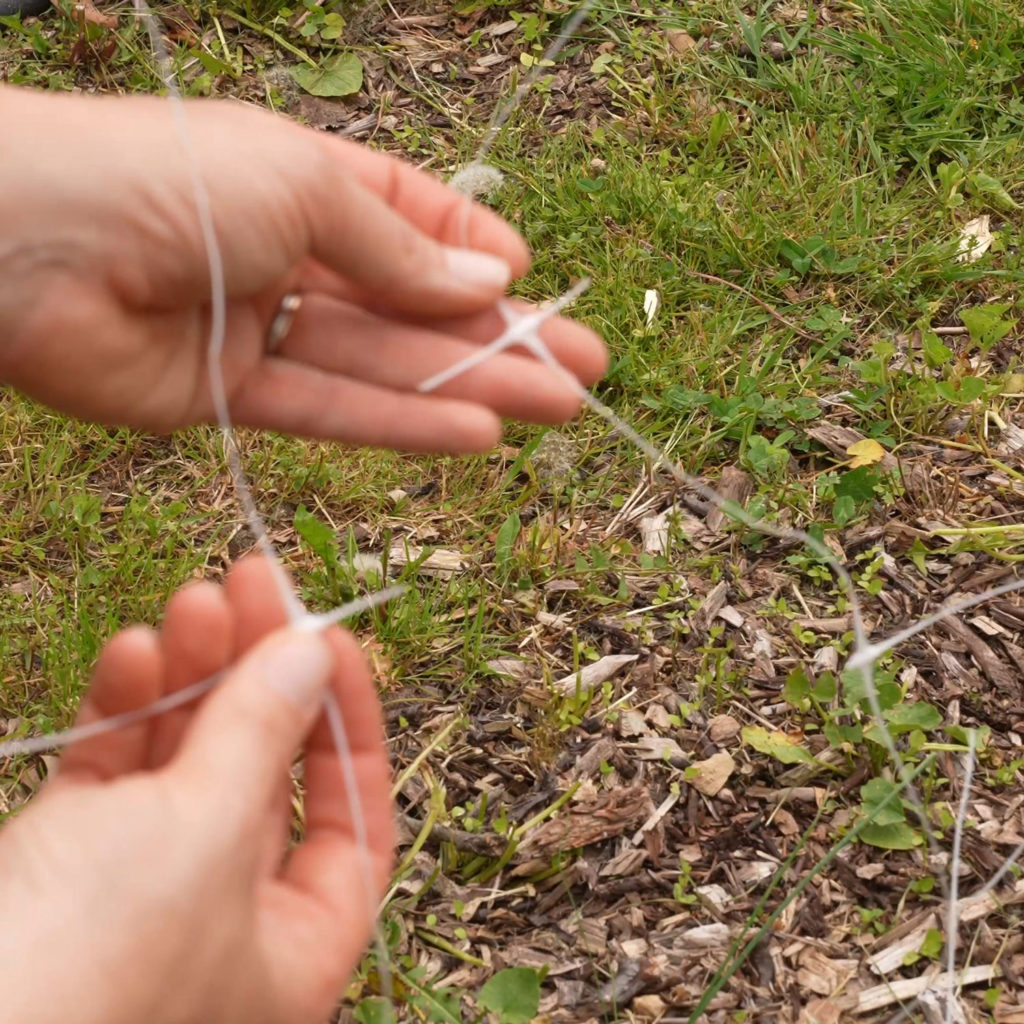
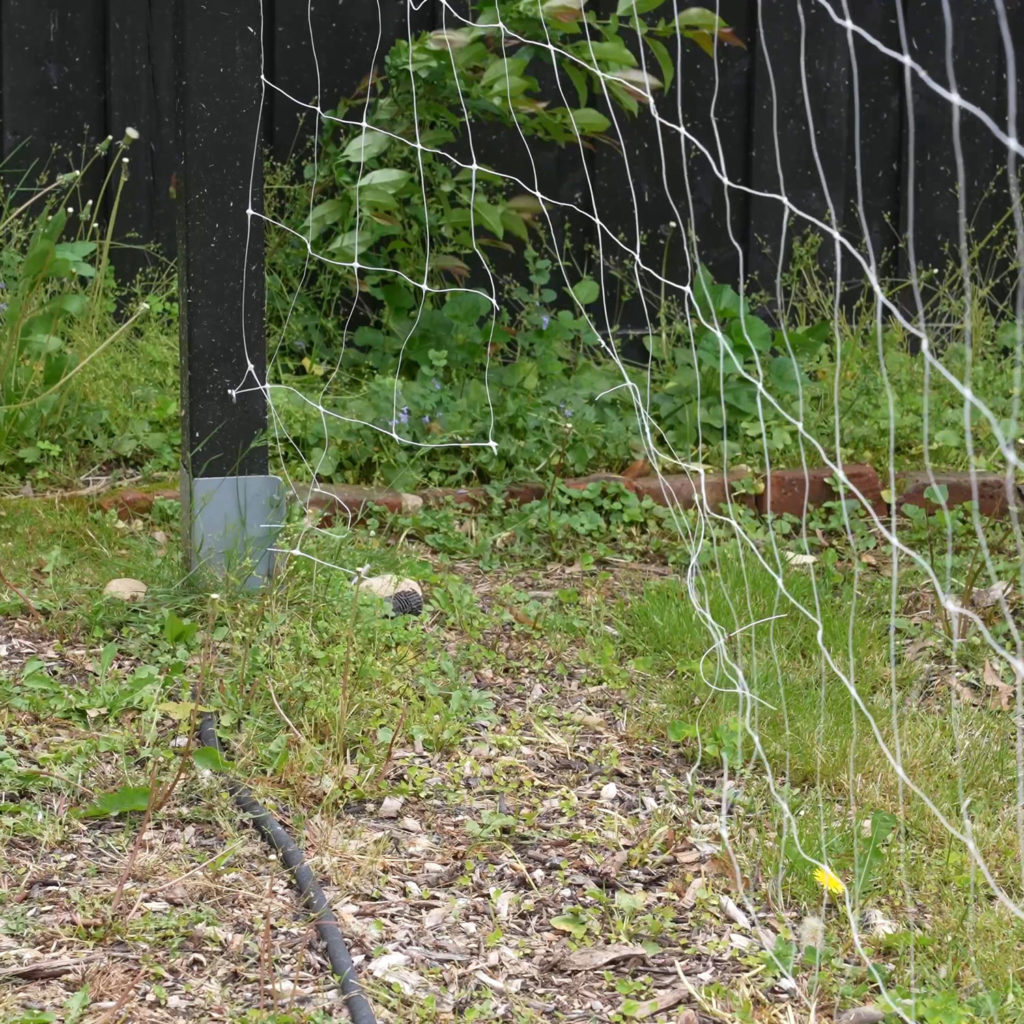
You’ll either need to take the cross-beam down or be prepared to wrestle with netting on a ladder. Use a rubber mallet if the beam is lodged in there.
The squares are 6″ x 6″, which is perfect for weaving our 2×4 through. This is, of course, easier said than done. I’ve worked with other trellis netting in the past, and this stuff doesn’t tangle as easily, and the joints are stronger, but it can still be a pain. I’ve tried attaching the netting with hooks in the past, and either the netting rips or the hooks pull out over time. Using the weave mounting method, this netting is surprisingly strong and can hold up huge crops of heavy slicer tomatoes, or even watermelons, with no problems.
Once you have the netting woven through and cut to the proper length, install the cross-beam again.
To secure the netting, tuck the ends under the 2x4s and wedge both the beam and netting back into the notch.
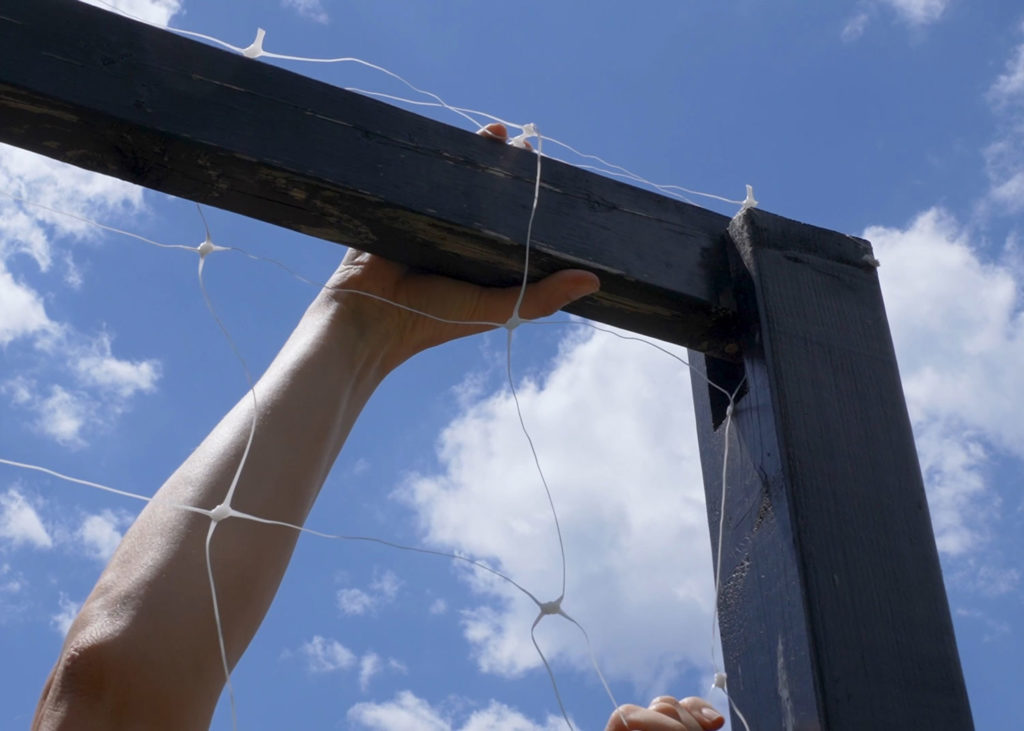
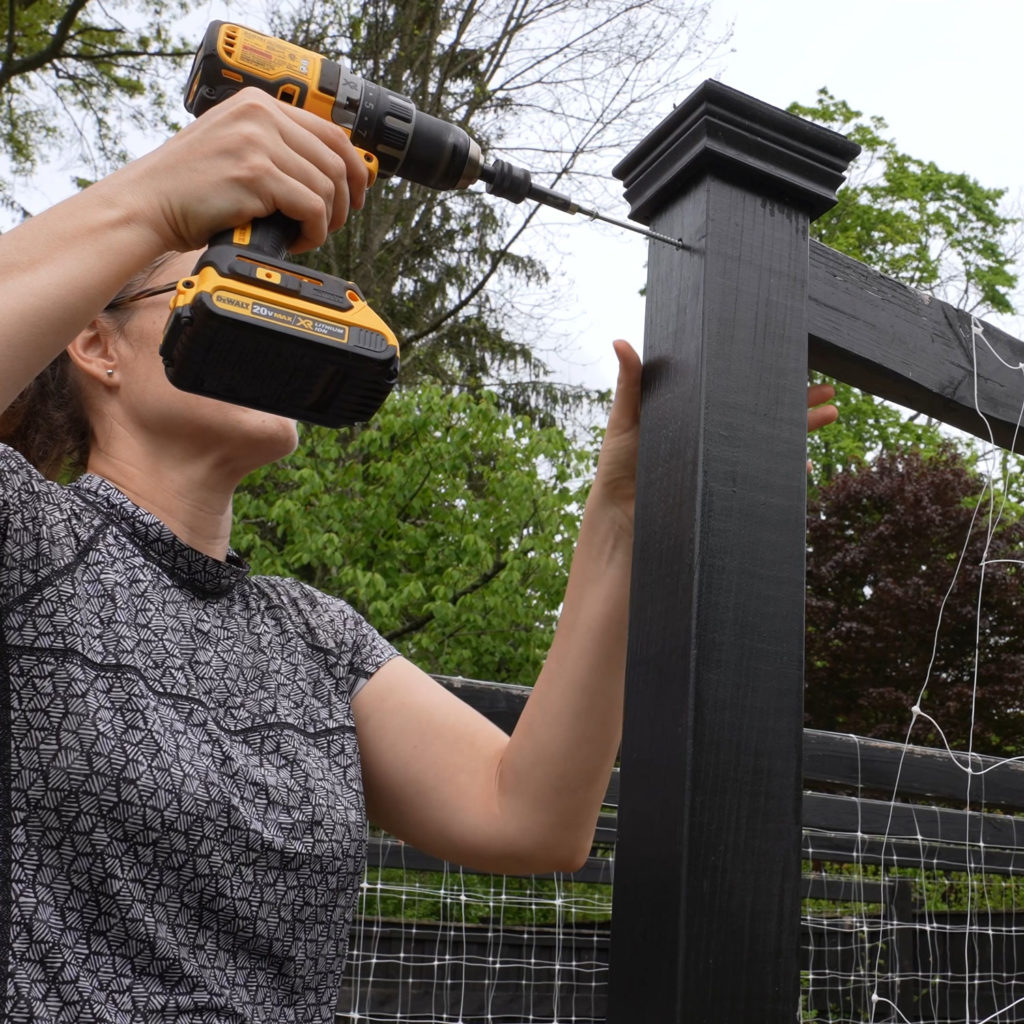
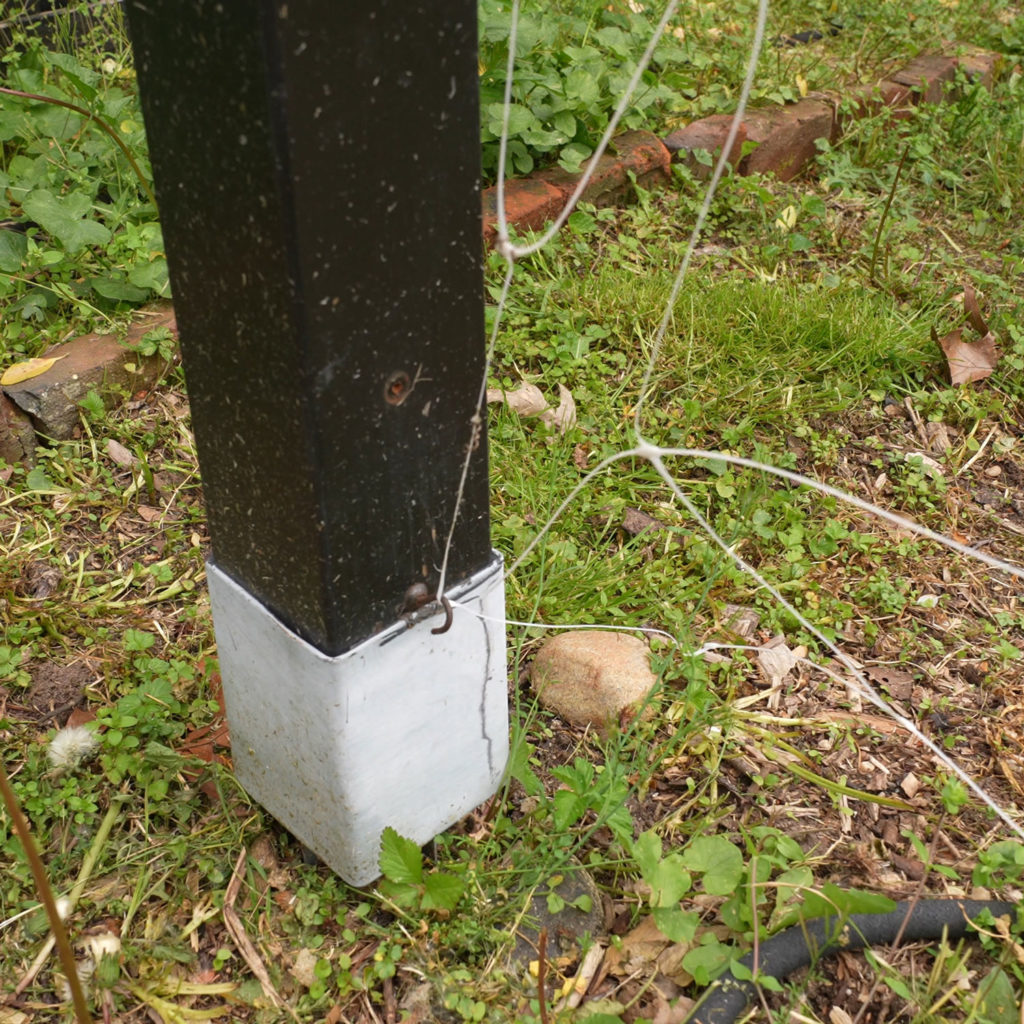
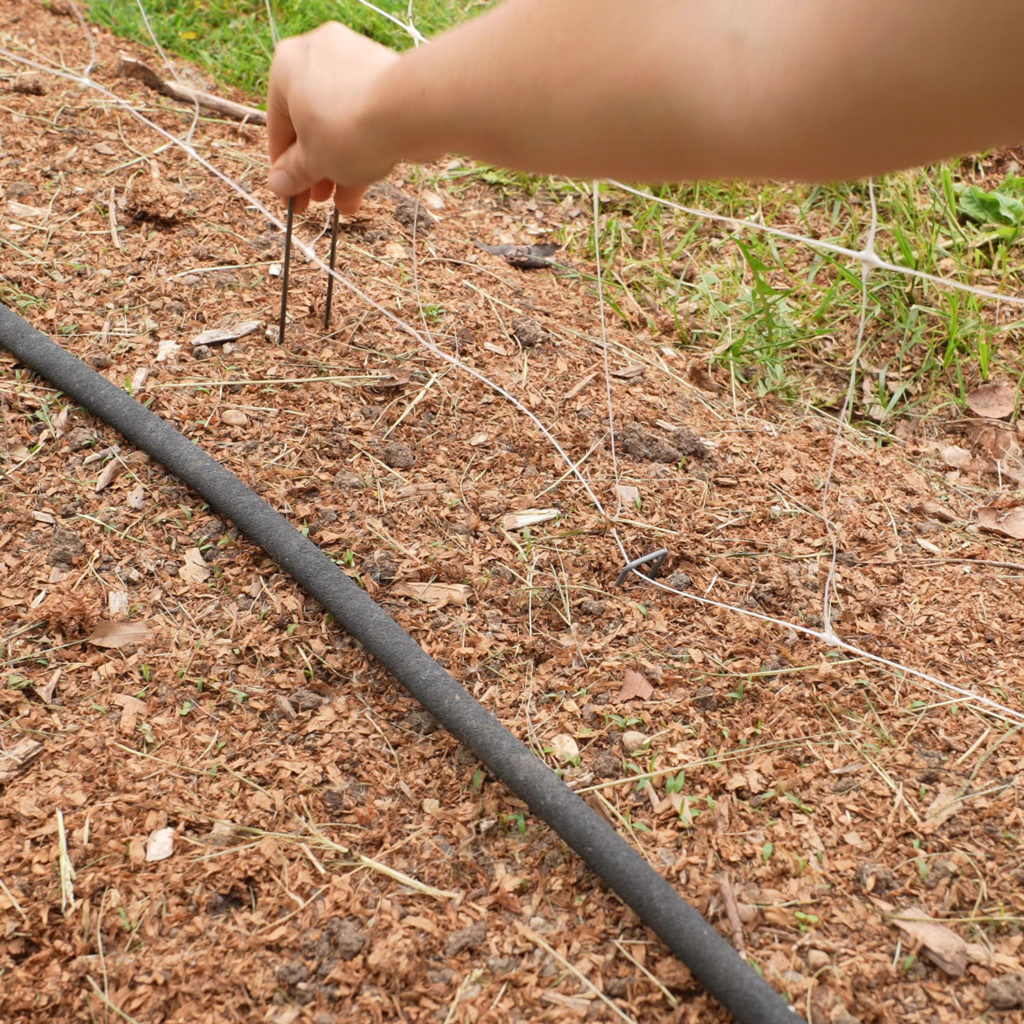
Then, at the bottom, screw in cup hooks on each post to hook on the bottom corners of the netting, which keeps the bottoms from flapping. If the netting is close to the ground, you could use landscape pins along the length, too. I’ve even run my soaker hose through the bottom squares to keep it in place, before. It did the job, but I was sorry I did when I needed to make adjustments to the hose.
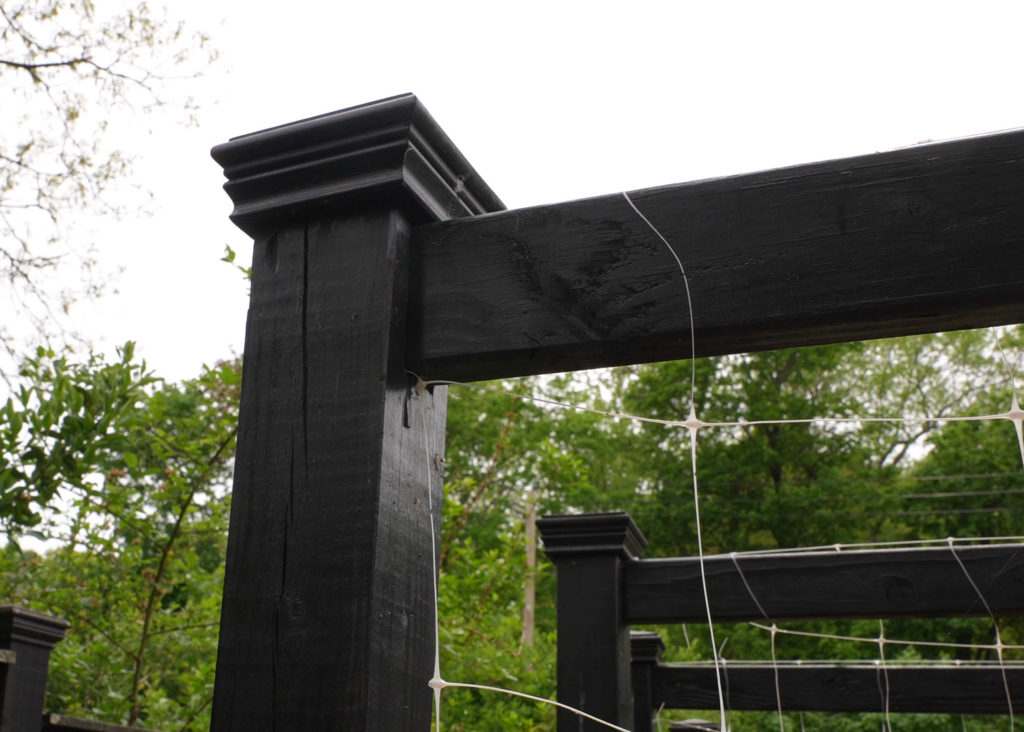
Also, I highly recommend post caps. I got these on Amazon, and they match my fence caps. They look cool, and they really help protect the post end, cross beam end, and that notch, which are all prone to water damage.
Training Vegetables On This Trellis
If you’ve trellised before, you guys are gonna love these trellises!
TRELLISING BEANS & PEAS
Beans and peas, I swear, will trellis on anything. As long as the netting isn’t higher than, say, 12″ off the ground, you don’t even need to lead them to it. Just plant them under the trellis, and these guys will just find the netting.
If they reach the top, which beans almost always do, they’ll just start going down again, which works for me. I’ve also let them run across the top to the other trellis beside it, if it was empty.
The varieties I’ve had great luck with on this trellis are Dwarf Sugar Grey Snow Peas, Karina shell peas, Seychelles pole beans (green beans), and Gold Rush yellow wax beans.
TRELLISING CORN
Corn, like my Who Gets Kissed Sweet Corn, likes to fall over if you plant in rows, so I’ve even used the trellis to tie the corn to.
TRELLISING SQUASH & MELONS
You can trellis heavier crops like watermelon, cantaloupe, pumpkins, and squash as long as you support the fruit somehow. I use these t-shirt scraps, which I make hammocks out of.
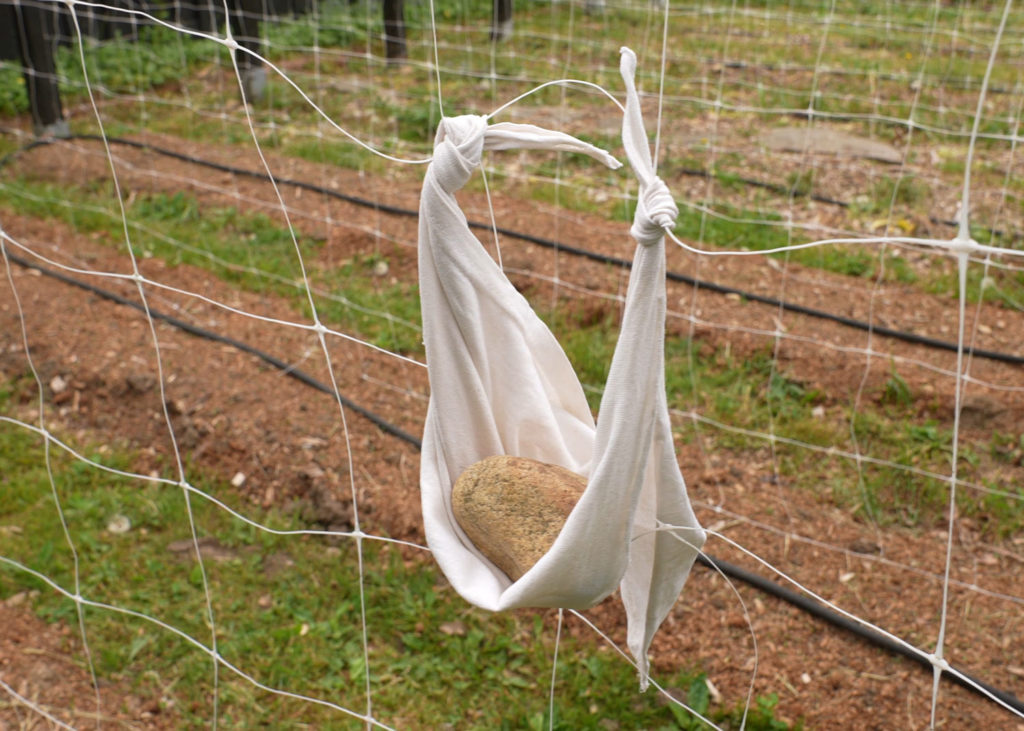
I’ve trellised a variety of watermelons (Big Tasty Hybrid, Red Ruby Hybrid, and Harvest Moon), cantaloupe (PMR Delicious 51, True Love F1), Waltham Butternut squash, and Pie Pita F1 Hulless pumpkins.
If any of these crops hit the top, I will usually let them go sideways if there’s extra trellis space, but if not, I clip them off since less vine length usually helps the fruit get bigger.
TRELLISING CUCUMBERS, SQUASH & TOMATOES
For cucumbers, squash, and tomatoes, I use compostable garden twine to tie them to the bottom square when they’re seedlings.
If you plant on either side of the trellis 12″ apart, with rows off-center, 6″ squares are perfect for giving each plant, with one leader, its own vertical line to follow. So tying them to the bottom also assigns each plant to its line and keeps everybody organized.
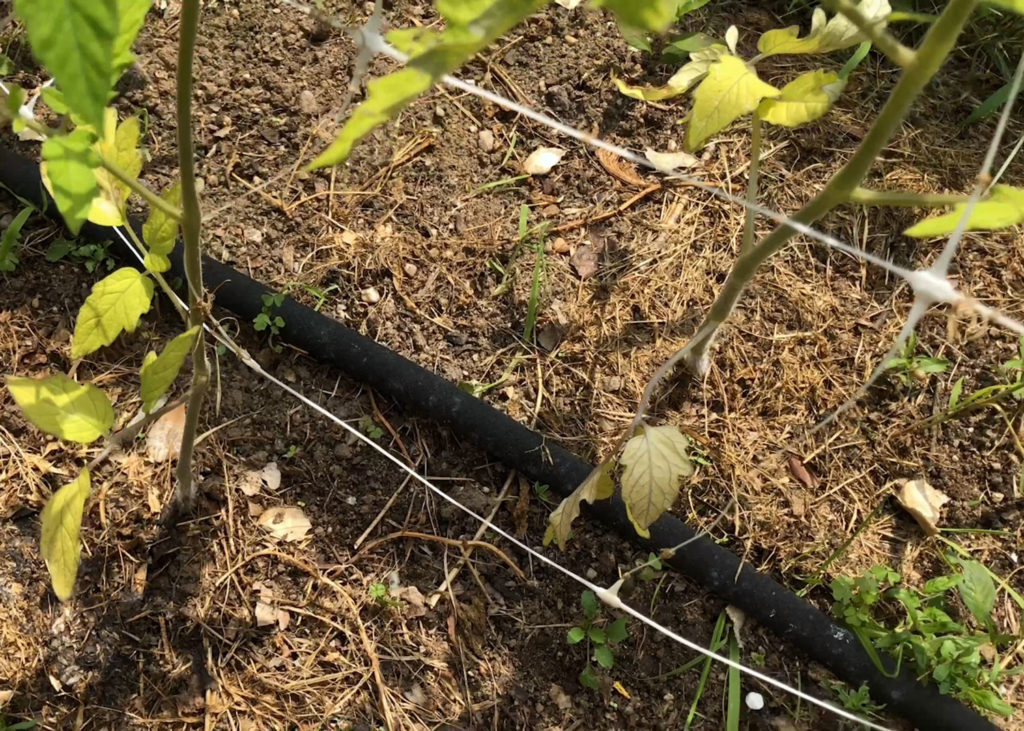
Once the cucumbers, squash, and melons are tied this way, they can usually find their own way up with no further training, although sometimes I have to come back and put them on the right line again.
My favorite cucumber varieties are, bar none, the super disease-resistant Marketmore 76 and Saber F1. They will usually go all the way to the top on this trellis!
TRELLISING TOMATOES
Tomatoes are trickier. They don’t naturally trellis and will start falling off the trellis if you don’t keep on top of them. For that reason, and because the fruits are so heavy, if tomatoes reach the top, I usually prune the tops, you’ll have a jungle of broken stems.
I’m always trying new varieties of tomatoes, but the ones I plant every year on this trellis are the BLT-worthy Damsel slicer, the inhumanly abundant Plum Perfect F1 paste tomato, and the lightly-acidic, gorgeous extra large Sunrise Bumble cherry tomato.
To train tomatoes, you can tie them or weave them in and out of the netting. I prefer weaving them because it’s faster, but the stems need to still be in a very bendable stage, or you risk breaking the stems. And only the top 12″ or so of a tomato plant is bendable enough.
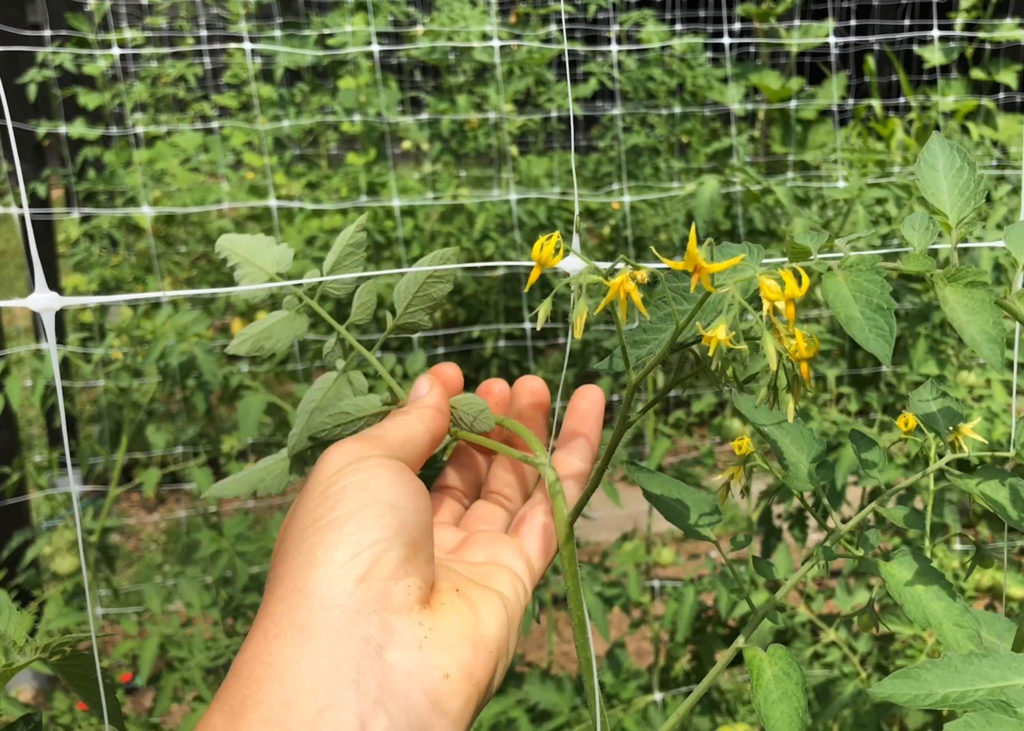
So that, of course, means you gotta come out every few days to do this, which, to be fair, if you have indeterminate tomatoes, you probably should be doing anyway to prune the suckers.
No rest for Garden Bosses!
I hope this article helped you out. Remember to sign up for my email newsletter for more garden resources.
Keep gardening like a boss, and I’ll see you guys soon


Leave a Reply